Source : https://medium.com/beyond-the-helpdesk/configuring-packetfence-for-use-with-dpsk-6519aaf6fe4d
Configuring PacketFence for use with DPSK
In this article I’ll provide a detailed overview on how to configure PacketFence for use with the DPSK (Dynamic Pre-Shared Key) feature.
We’ll be using a Cisco 3504 Wireless LAN Controller to create our lab test, but the process should be fairly uniform across different vendors.
First up, you’ll want to install PacketFence using either the ZEN (Zero Effort NAC) option, or on a fresh install of Debian or CentOS.
A detailed guide for both options can be found on the PacketFence website.
Once installed, you’ll get access to a web interface running on port 1443:
https://[PacketFence IP]:1443
Initial Setup
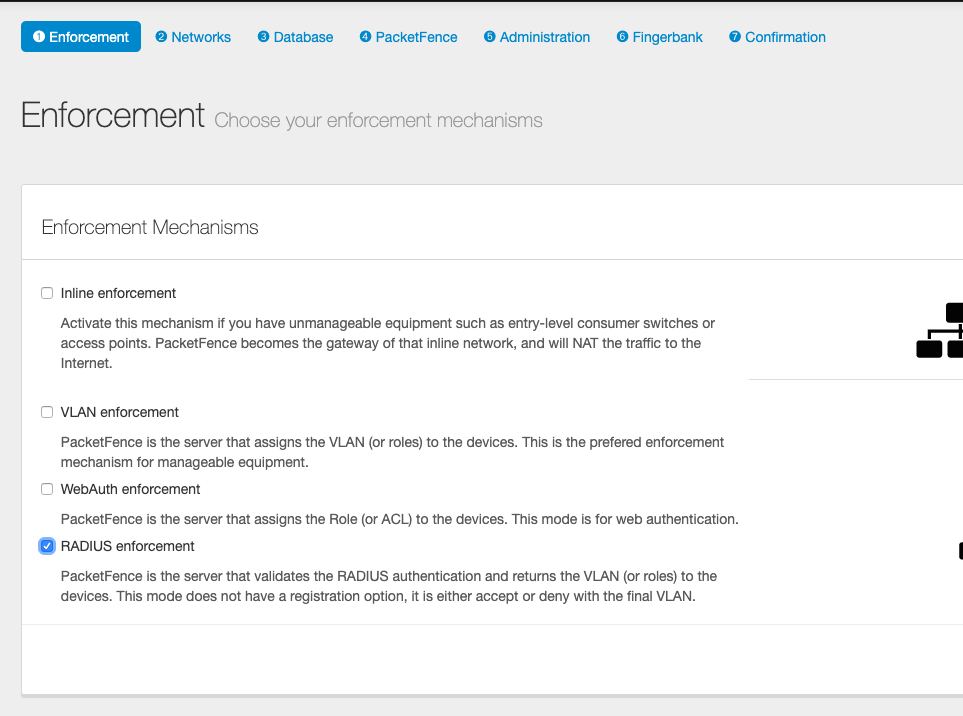
Go through the initial setup wizard, which is pretty straight forward except for a couple of things which I’ll explain below.
Firstly, ensure you select ‘RADIUS Enforcement’ as the Enforcement mode.
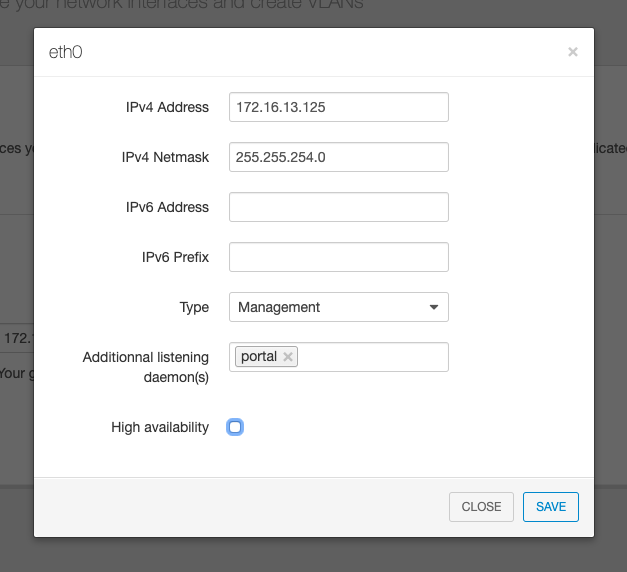
On the networks tab, there will be an interface entry pre-populated for ‘eth0', which should be have the IP address PacketFence got from DHCP (or from you if you’re using a static address).
Click this interface and make its type ‘Management’, adding an additional listening daemon for ‘portal’.
On the next screen, set your passwords. To create your MySQL root password, just hit ‘Test’ and a pop will appear asking you to set a new password.
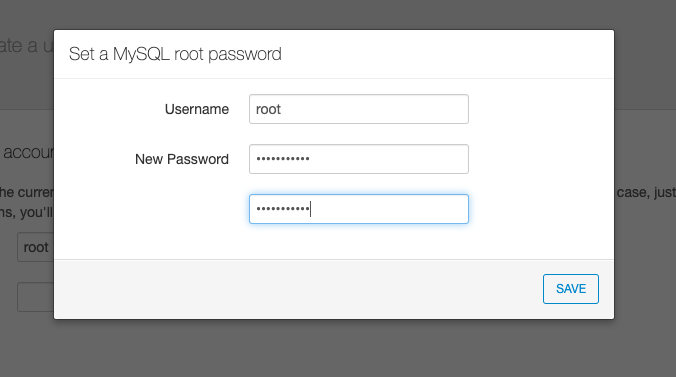
Continue through the steps until all passwords are set.
Set up Fingerbank if you would like device fingerprinting.
This is useful if you want to configure different behaviours based on device type.
Once everything is filled in as per your environment, start PacketFence’s services and you will be taken to the main admin interface.
Authentication Sources
You’ll want to set up an Authentication Source such as Active Directory for users and admins to authenticate against.
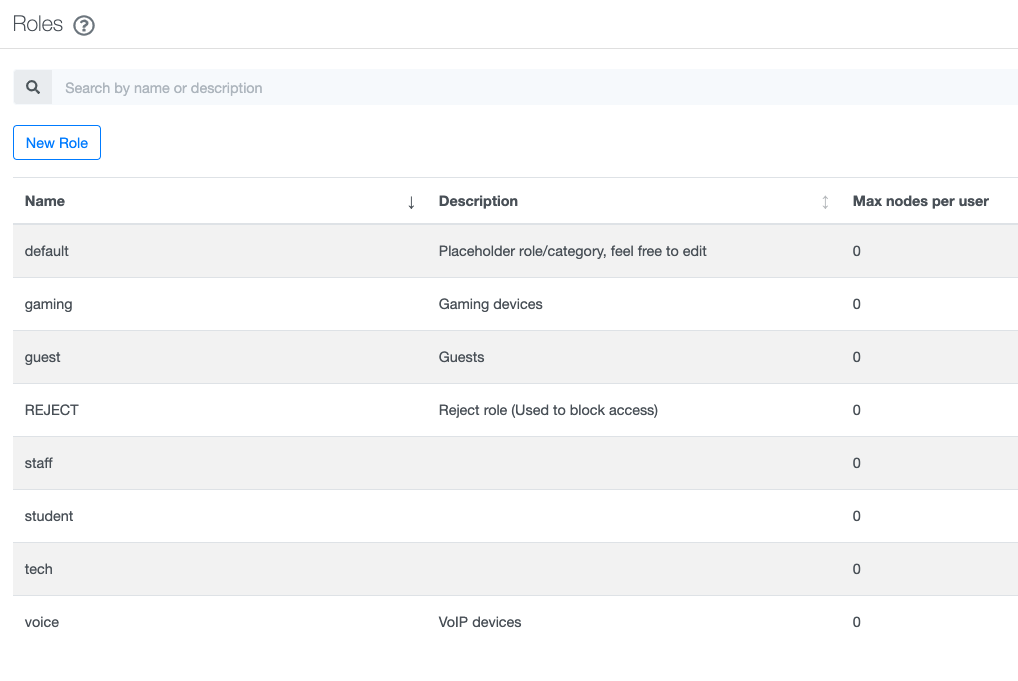
Before we do so, head over to Policies and Access Control > Roles and add a Role for each VLAN you’d like to use.
Now head over to Policies and Access Control > Authentication Sources and add a new source of type ‘Active Directory’.
The settings will depend on your AD setup, but here’s an example of what we ended up with:
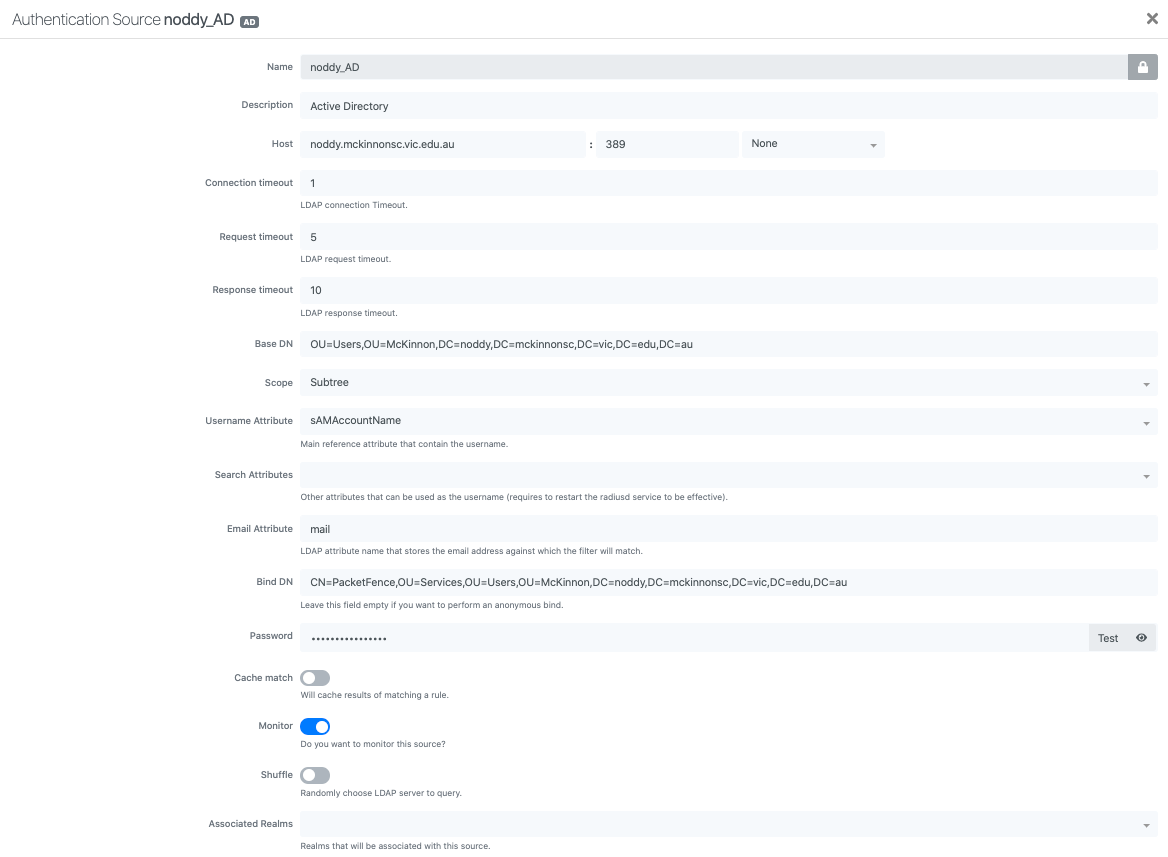
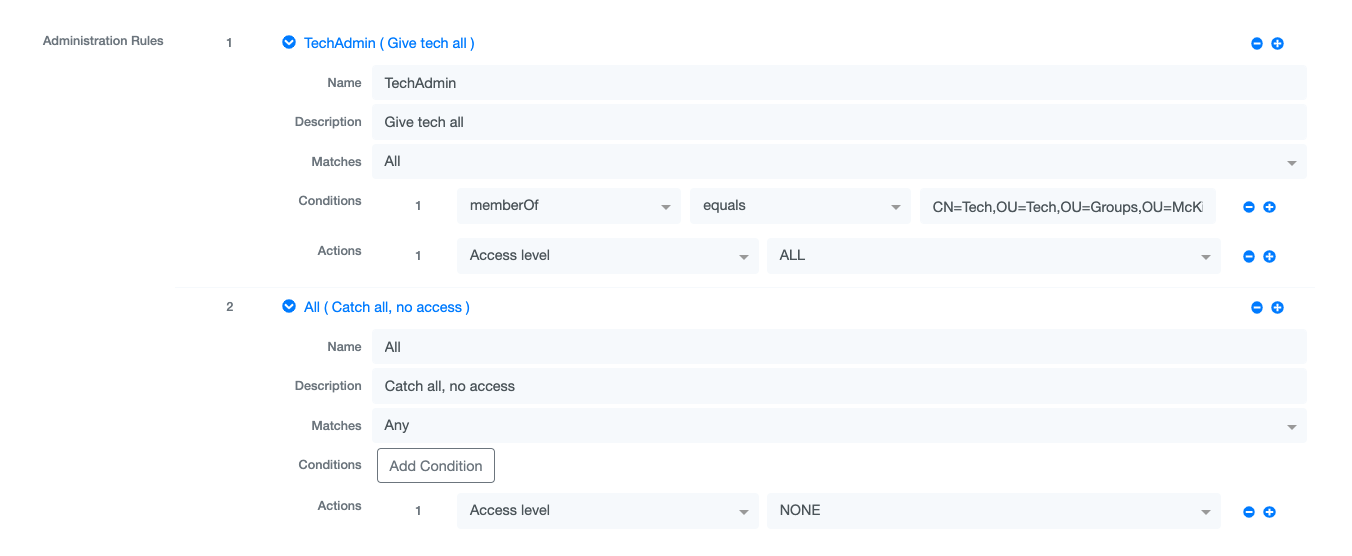
Once you’ve configured and tested the settings for AD, you’ll want to give it some rules.
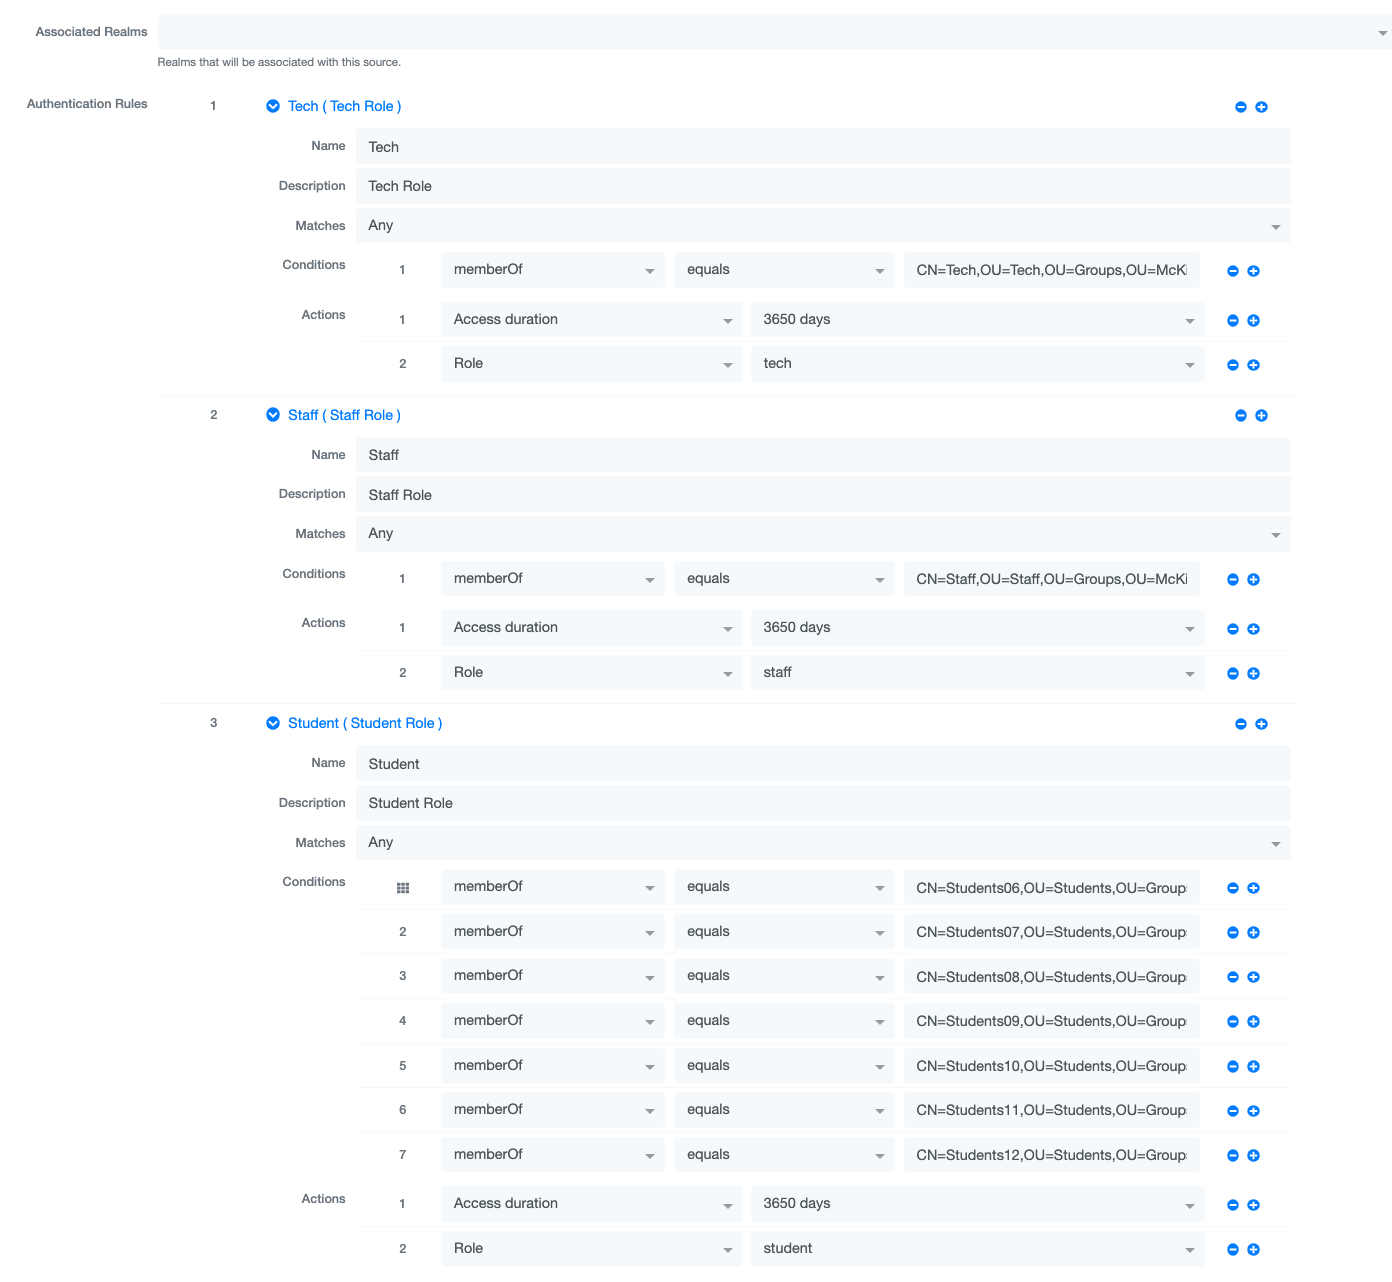
To test these rules, PacketFence includes a script by the name of ‘pftest’ which allows you to run an authentication test on any username or password you wish by running the following in the PacketFence ‘bin’ directory (usually located at /usr/local/pf/bin):
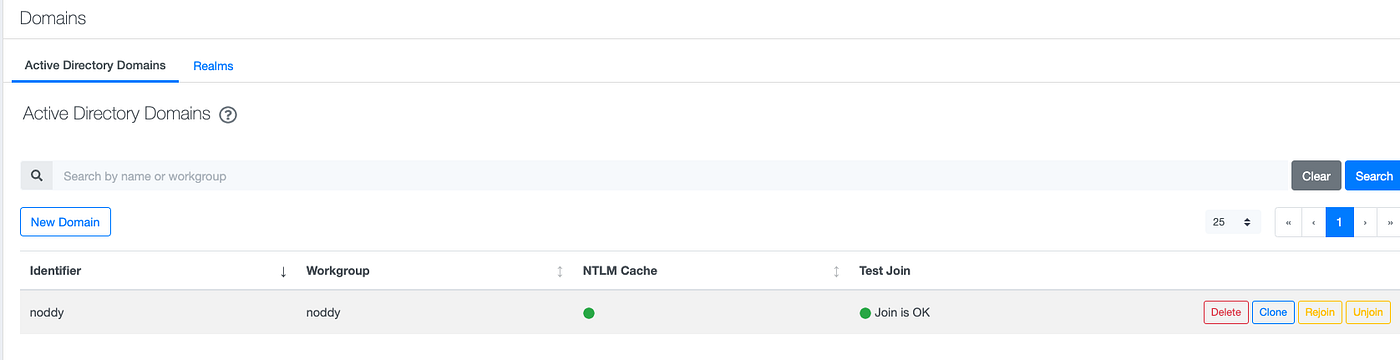
./pftest authentication [username] [password]We’ll also want to join PacketFence to the domain over at Policies and Access Control > Active Directory Domains.
Network Devices
Next up you’ll want to add a ‘Switch’, eg. your Wireless Controller.
Here’s an example of ours.

The important part here is to ensure ‘Roles’ is configured correctly, enabling only ‘Role by VLAN ID’ and setting the ID’s as per your network.

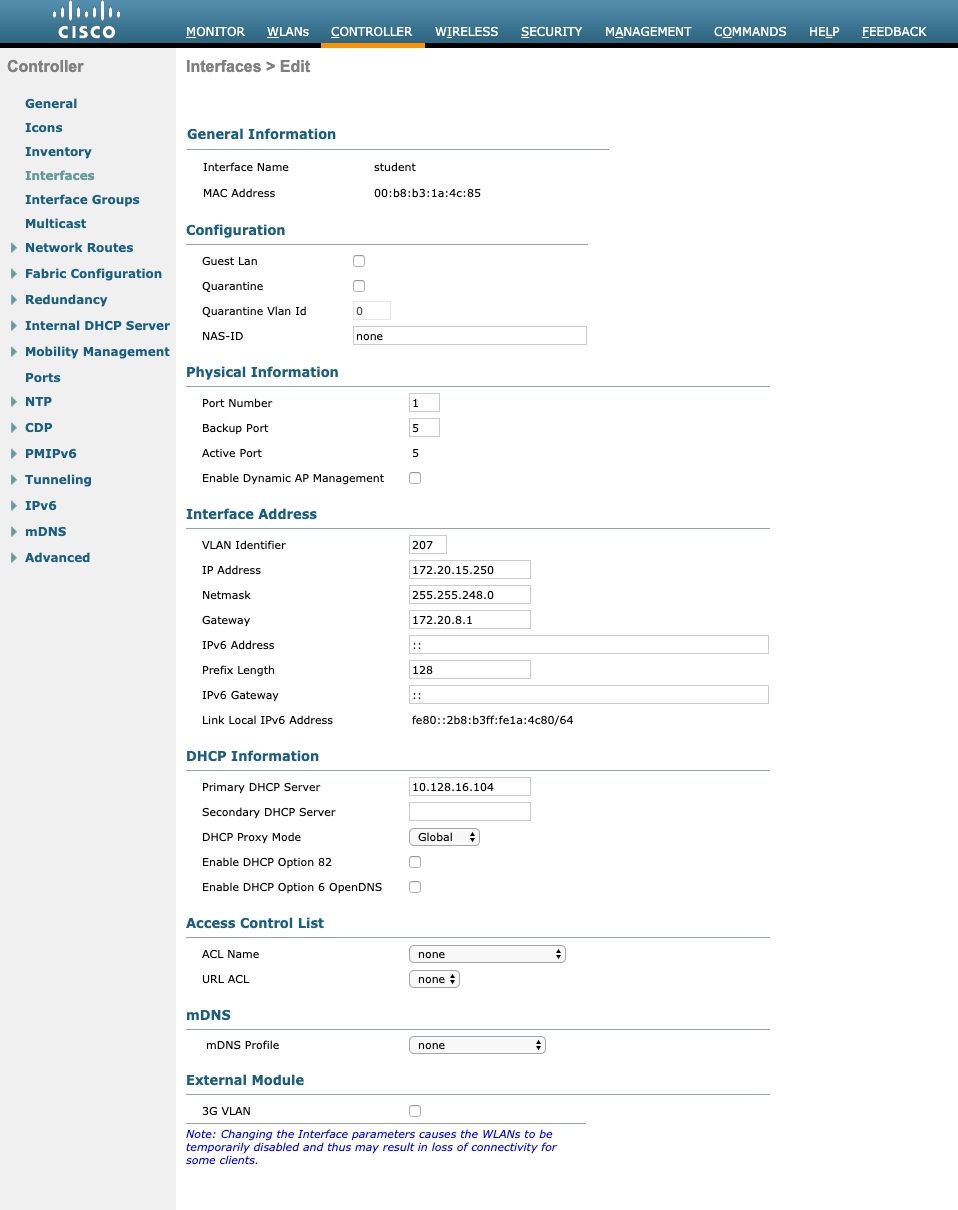
So the WLC knows what PacketFence is talking about, you have to configure an interface for each VLAN you’d like to use and give it a static IP address.
On the Cisco 3504, this is under Controller > Interfaces.
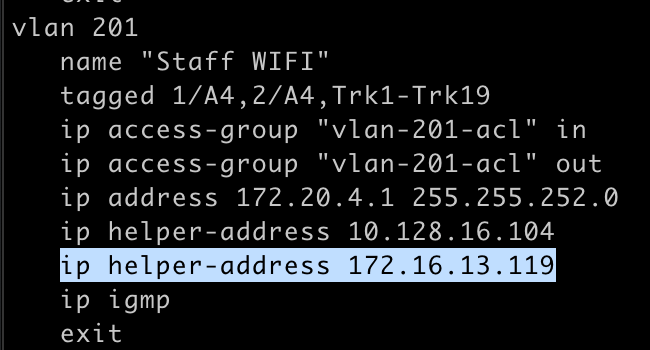
IP Helpers
PacketFence needs to know about DHCP requests on the network to function properly. To forward all relevant requests to PacketFence, you’ll want to add a a ip helper-address address to each VLAN to ensure PacketFence receives these requests.
I our case we added an ‘ip helper-address’ to each relevant VLAN on our Core Switch, an Aruba, which looks something like this:
As you add these, you’ll be able to verify it by heading to ‘Nodes’ on the PacketFence admin interface.
You should see devices quickly populate this list as PacketFence discovers their DHCP requests.
SSID’s
You’ll want two SSID’s, one for onboarding and one for secure access.
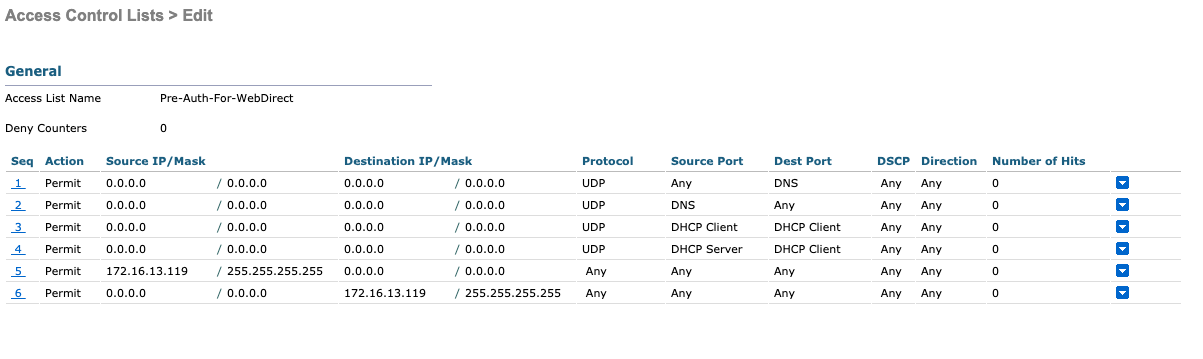
Before we begin, we’ll create an ACL for use on the open SSID.
The ACL should block everything except the PacketFence web portal, DCHP and DNS and should look something like below.
We’ll also add PacketFence as an authentication server under SECURITY > AAA > RADIUS > Authentication, as well as under Accounting.
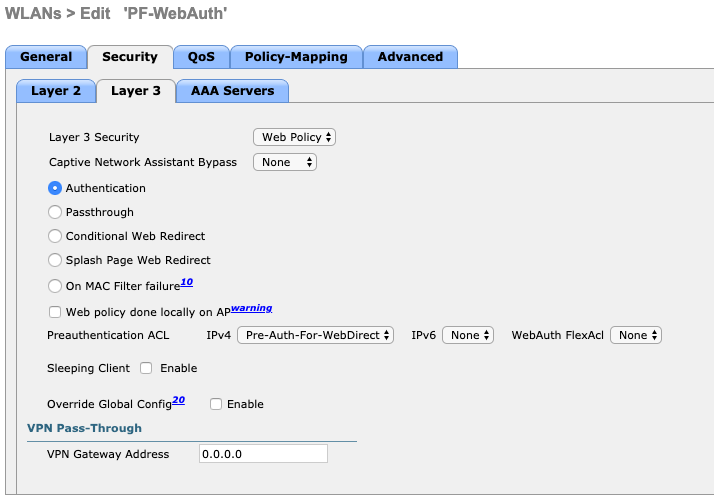
For this lab, I chose ‘PF-WebAuth’ as the onboarding SSID which is open, with MAC filtering enabled and no Layer 2 security.
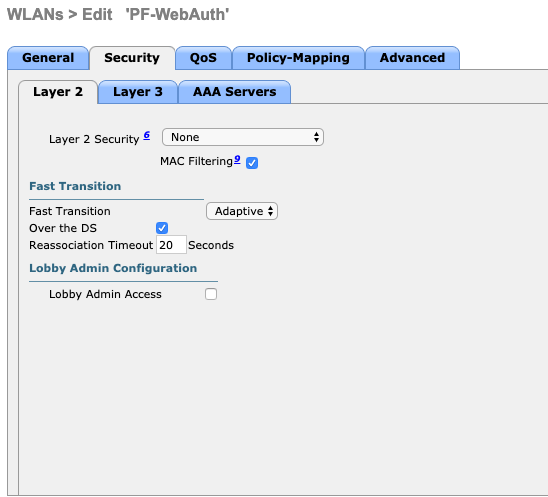
Under Layer 3, we want to enable Web Policy and apply the ACL from earlier.
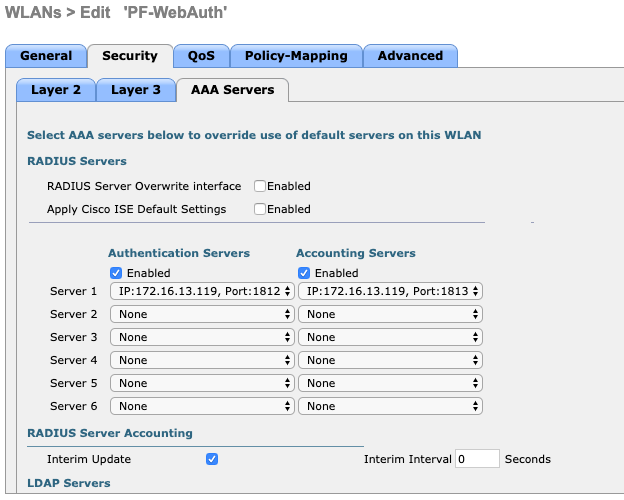
On the ‘AAA Servers’ tab, select the PacketFence server as the Authentication Server and the Accounting Server.
Go to the Advanced tab and ensure ‘Allow AAA Override’ is ticked.

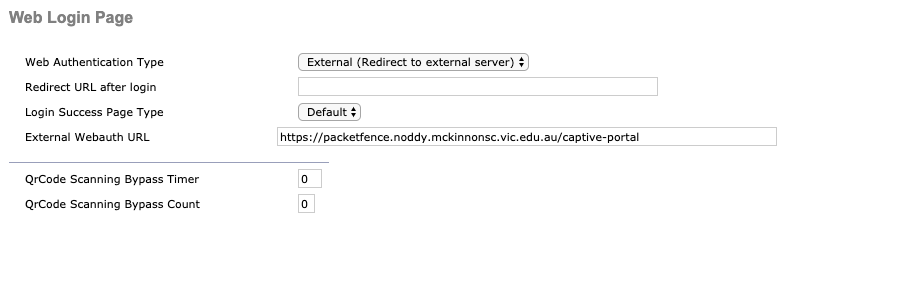
We’ll also want to configure the web portal URL under Security > Web Auth > Web Login Page to be: https://[PacketFence-ip]/captive-portal
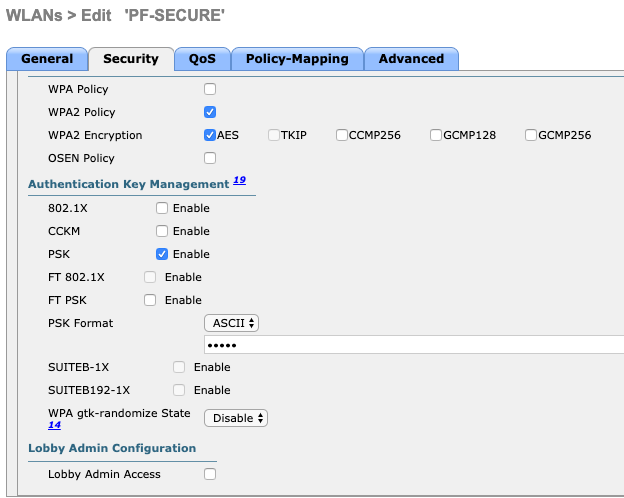
Now we’ll move on to the Secure SSID.
Under Security > Layer 2, we’ll want to enable WPA+WPA2, WPA2 Policy and AES. We’ll also want to tick PSK, set ASCII as the PSK Format and input a default PSK.

Again, set the Authentication and Accounting Servers under ‘AAA Servers’ and ensure ‘Allow AAA Override’ is ticked under the ‘Advanced’ tab.
Connection Profiles
Next we want to configure some Connection profiles within PacketFence to make use of the SSID’s we configured.
Before we continue, we’ll create a provisioner for DPSK’s under Advanced Access Configuration > Provisioners.

Now we’re ready to configure our Connection Profiles.
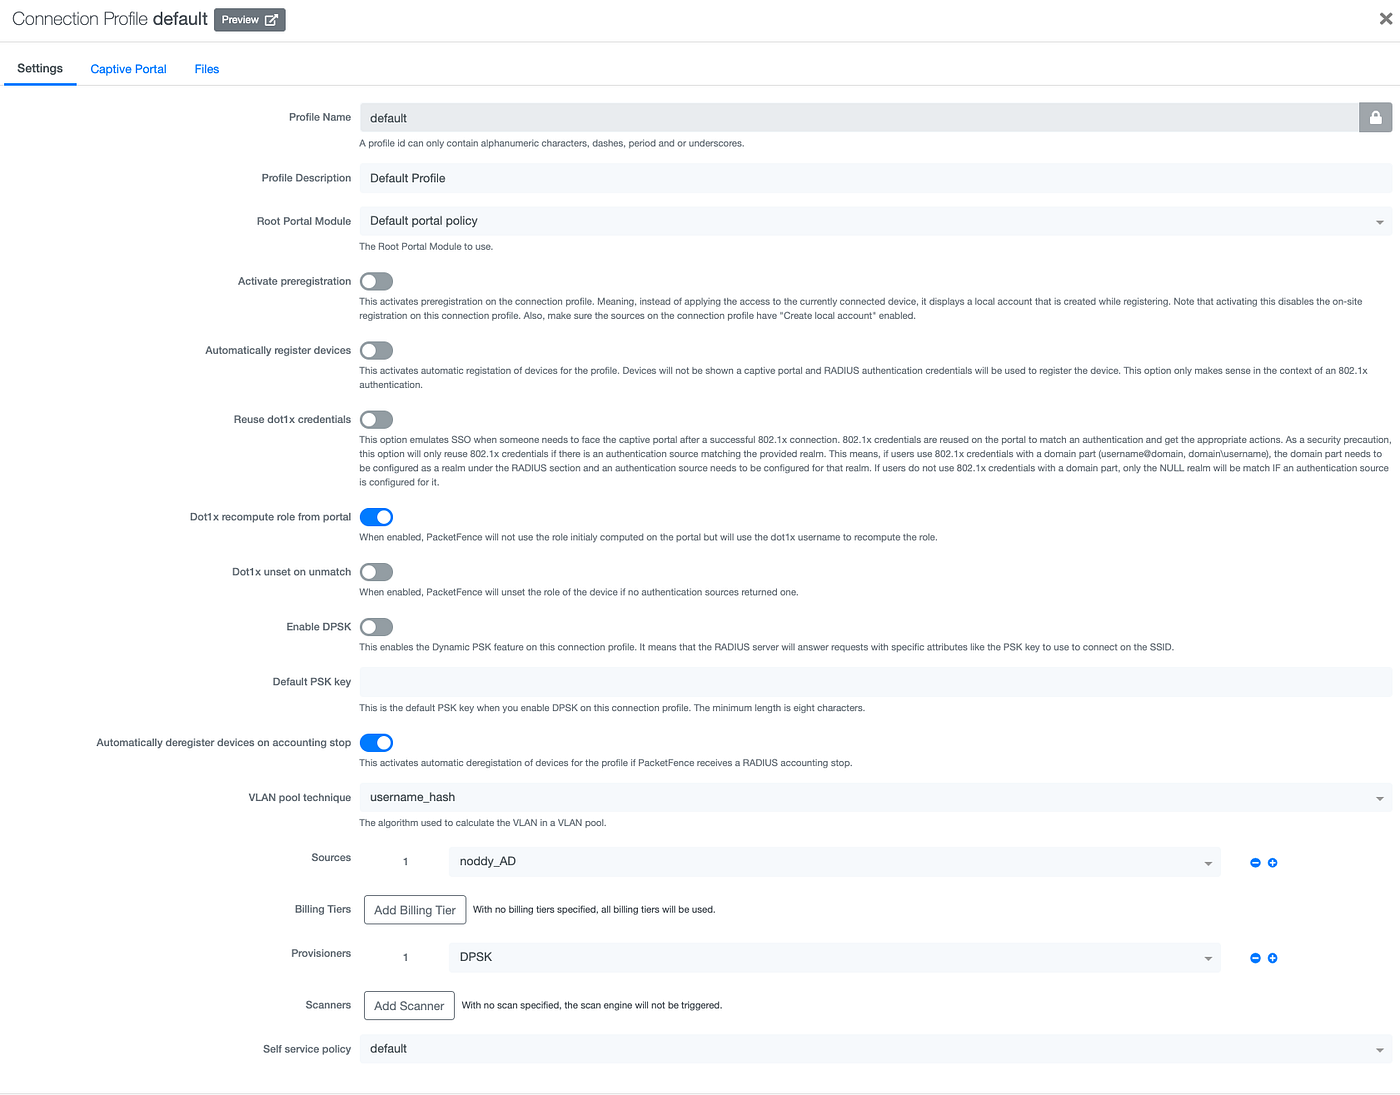
Firstly, edit the default profile, ensuring ‘Dot1x recompute role from portal’ is turned on, your authentication source is selected under ’Source’ and the provisioner for DPSK’s you just created is selected under ‘Provisioners’.
I’ve also selected the ‘default’ policy under ‘Self service policy’, which as we’ll see later allows users to register their own devices using its MAC address.
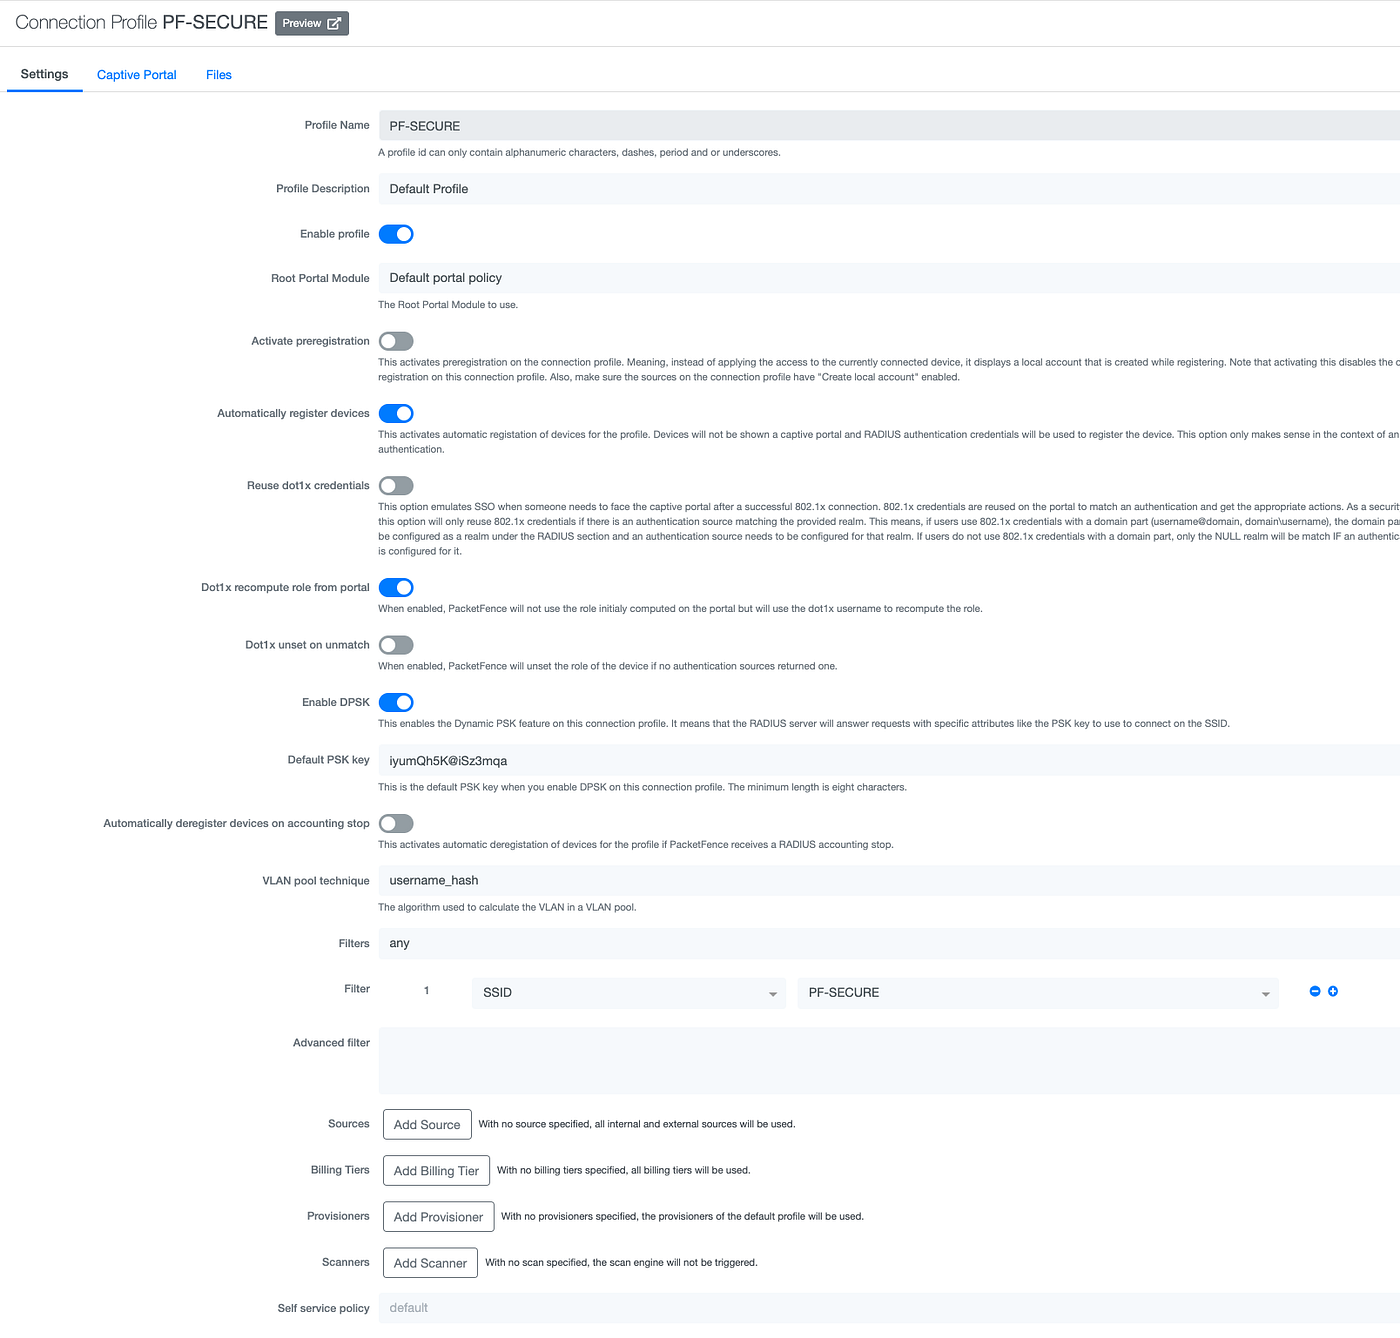
Next, we’ll create a second Connection Profile to match the secure SSID, configured to filter based on the name of the SSID.
Portal Modules
This will depend on what else you want out of PacketFence and is highly customisable, however this is the workflow we ended up with:

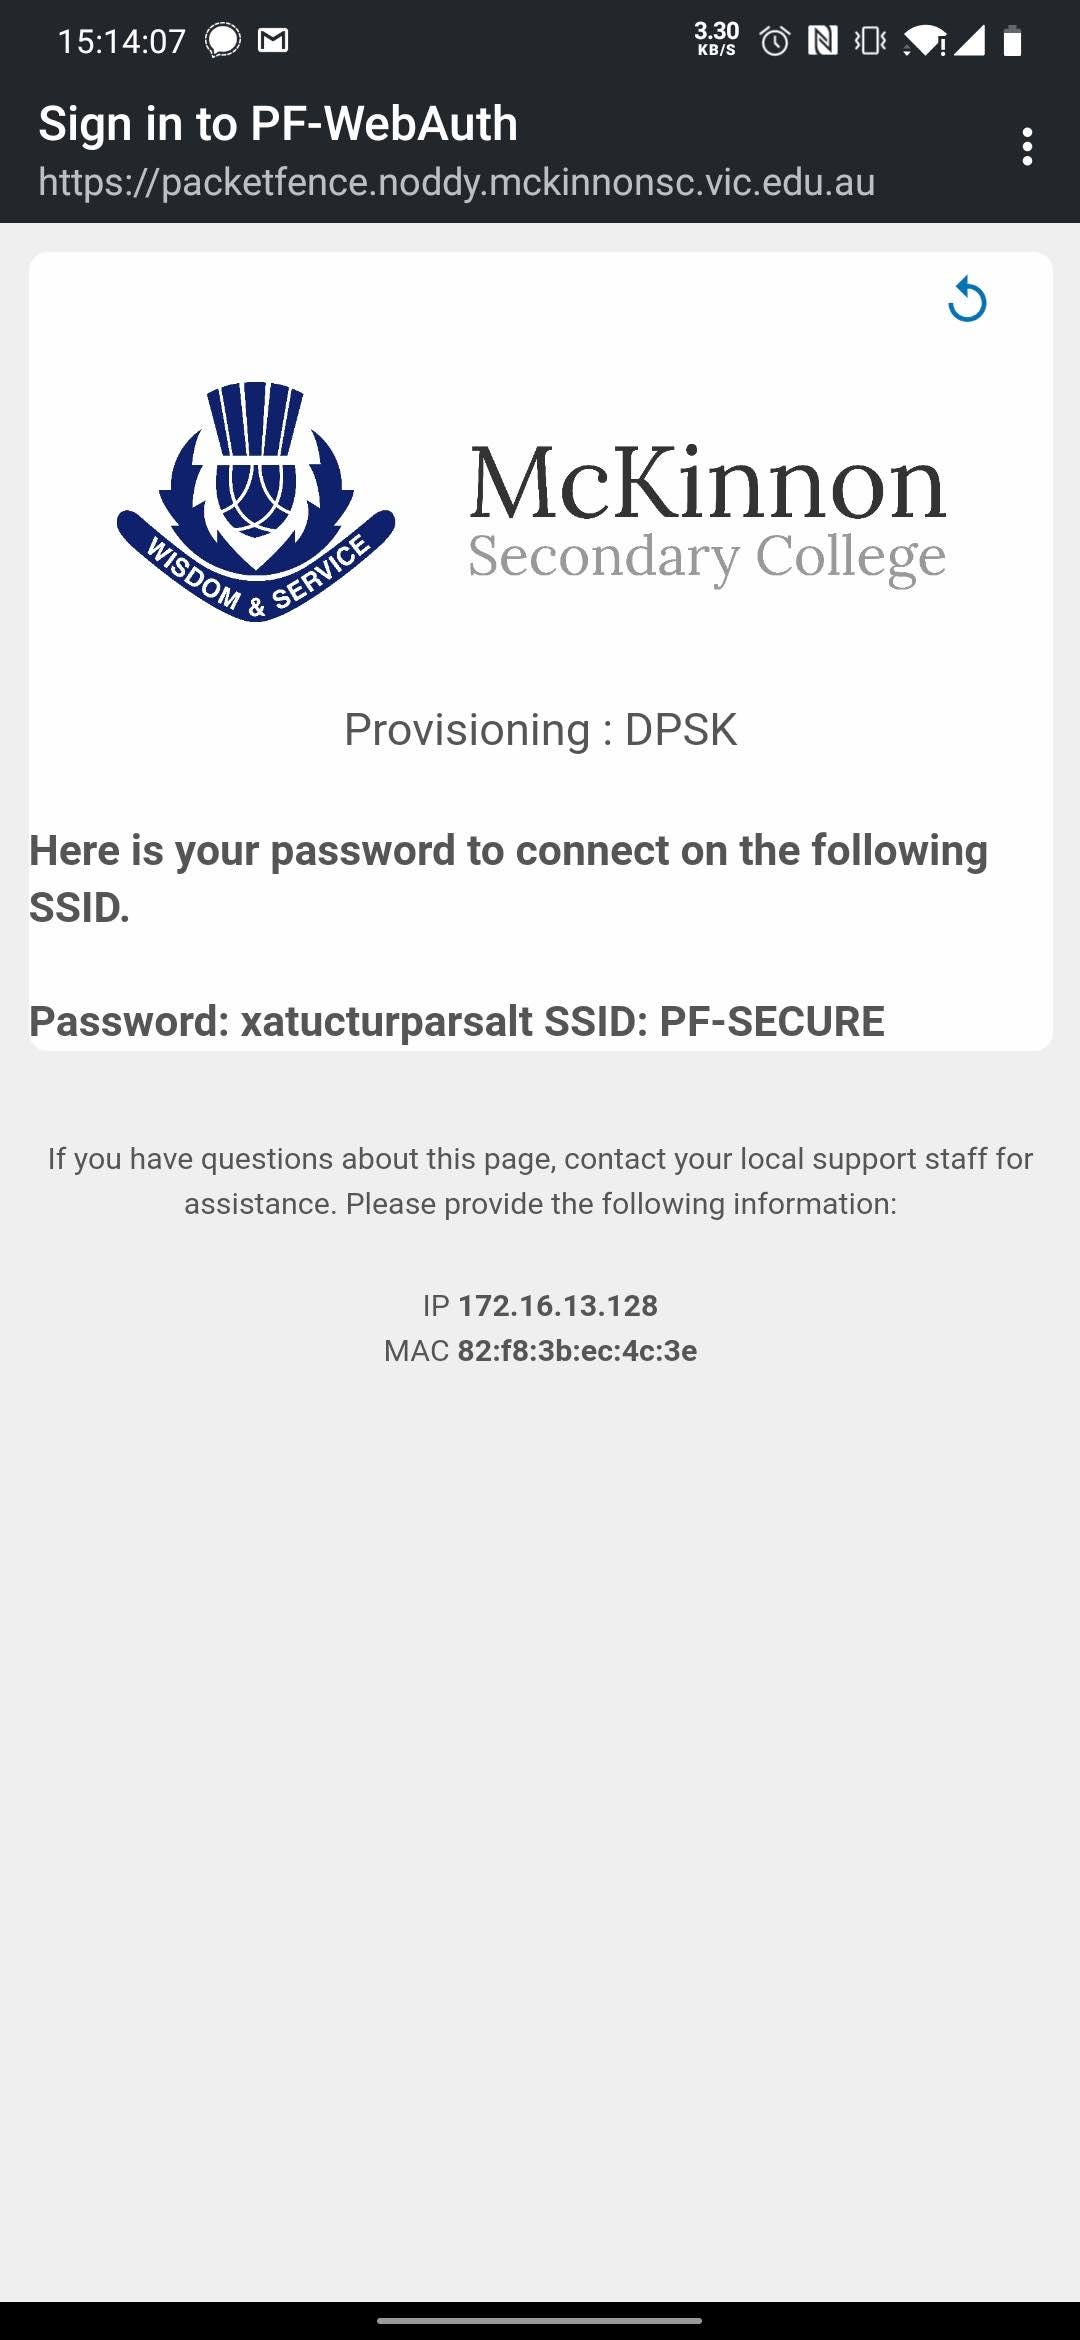
In addition to providing a simple login to obtain a DPSK, we wanted to include an easy way for guests to connect by verifying a phone number and we also wanted to include a way to manage your own devices, eg. add a device using its MAC address, or remove a device.
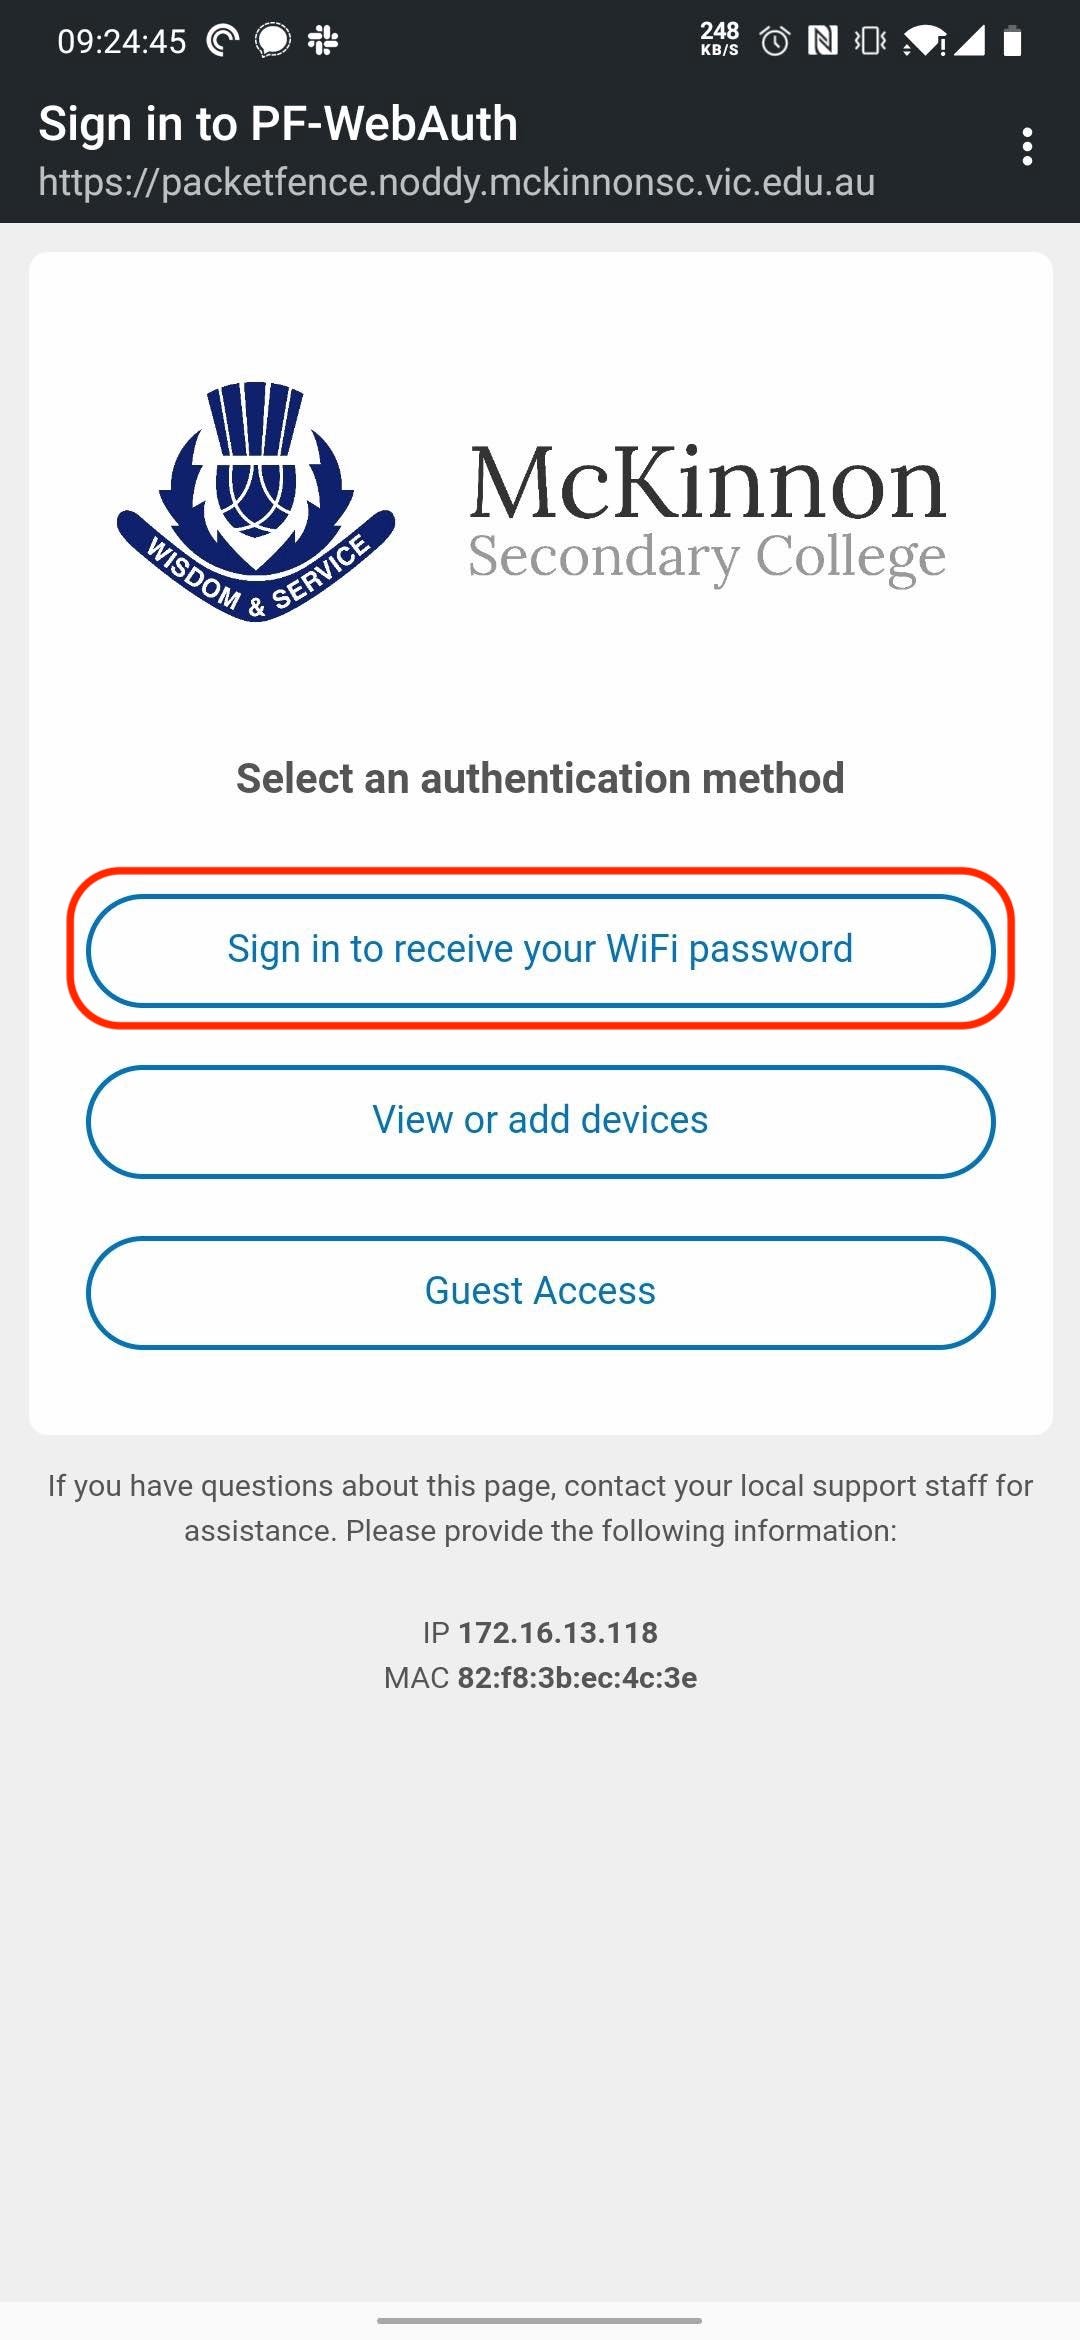
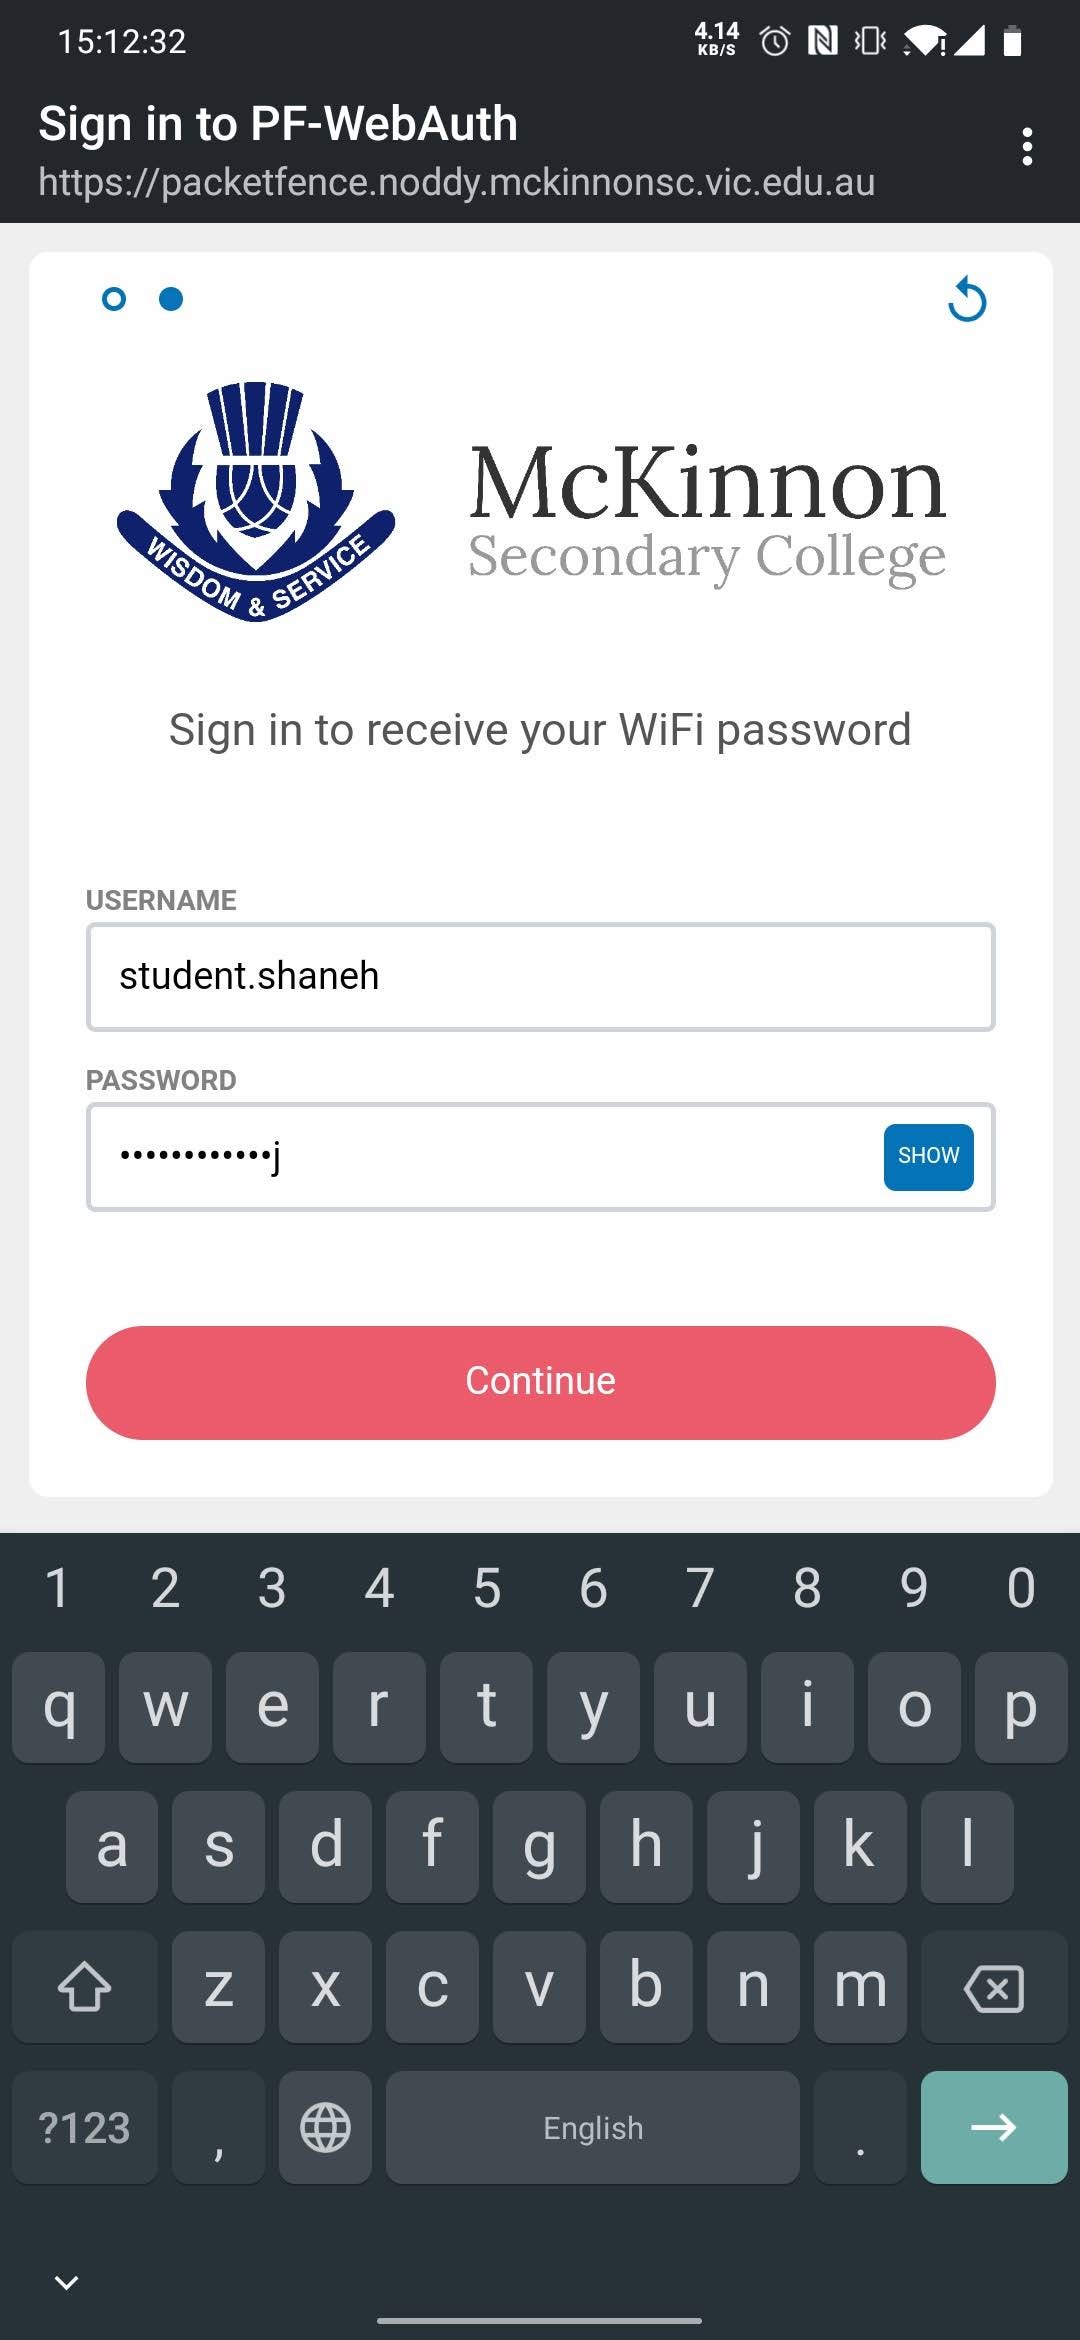
The Result
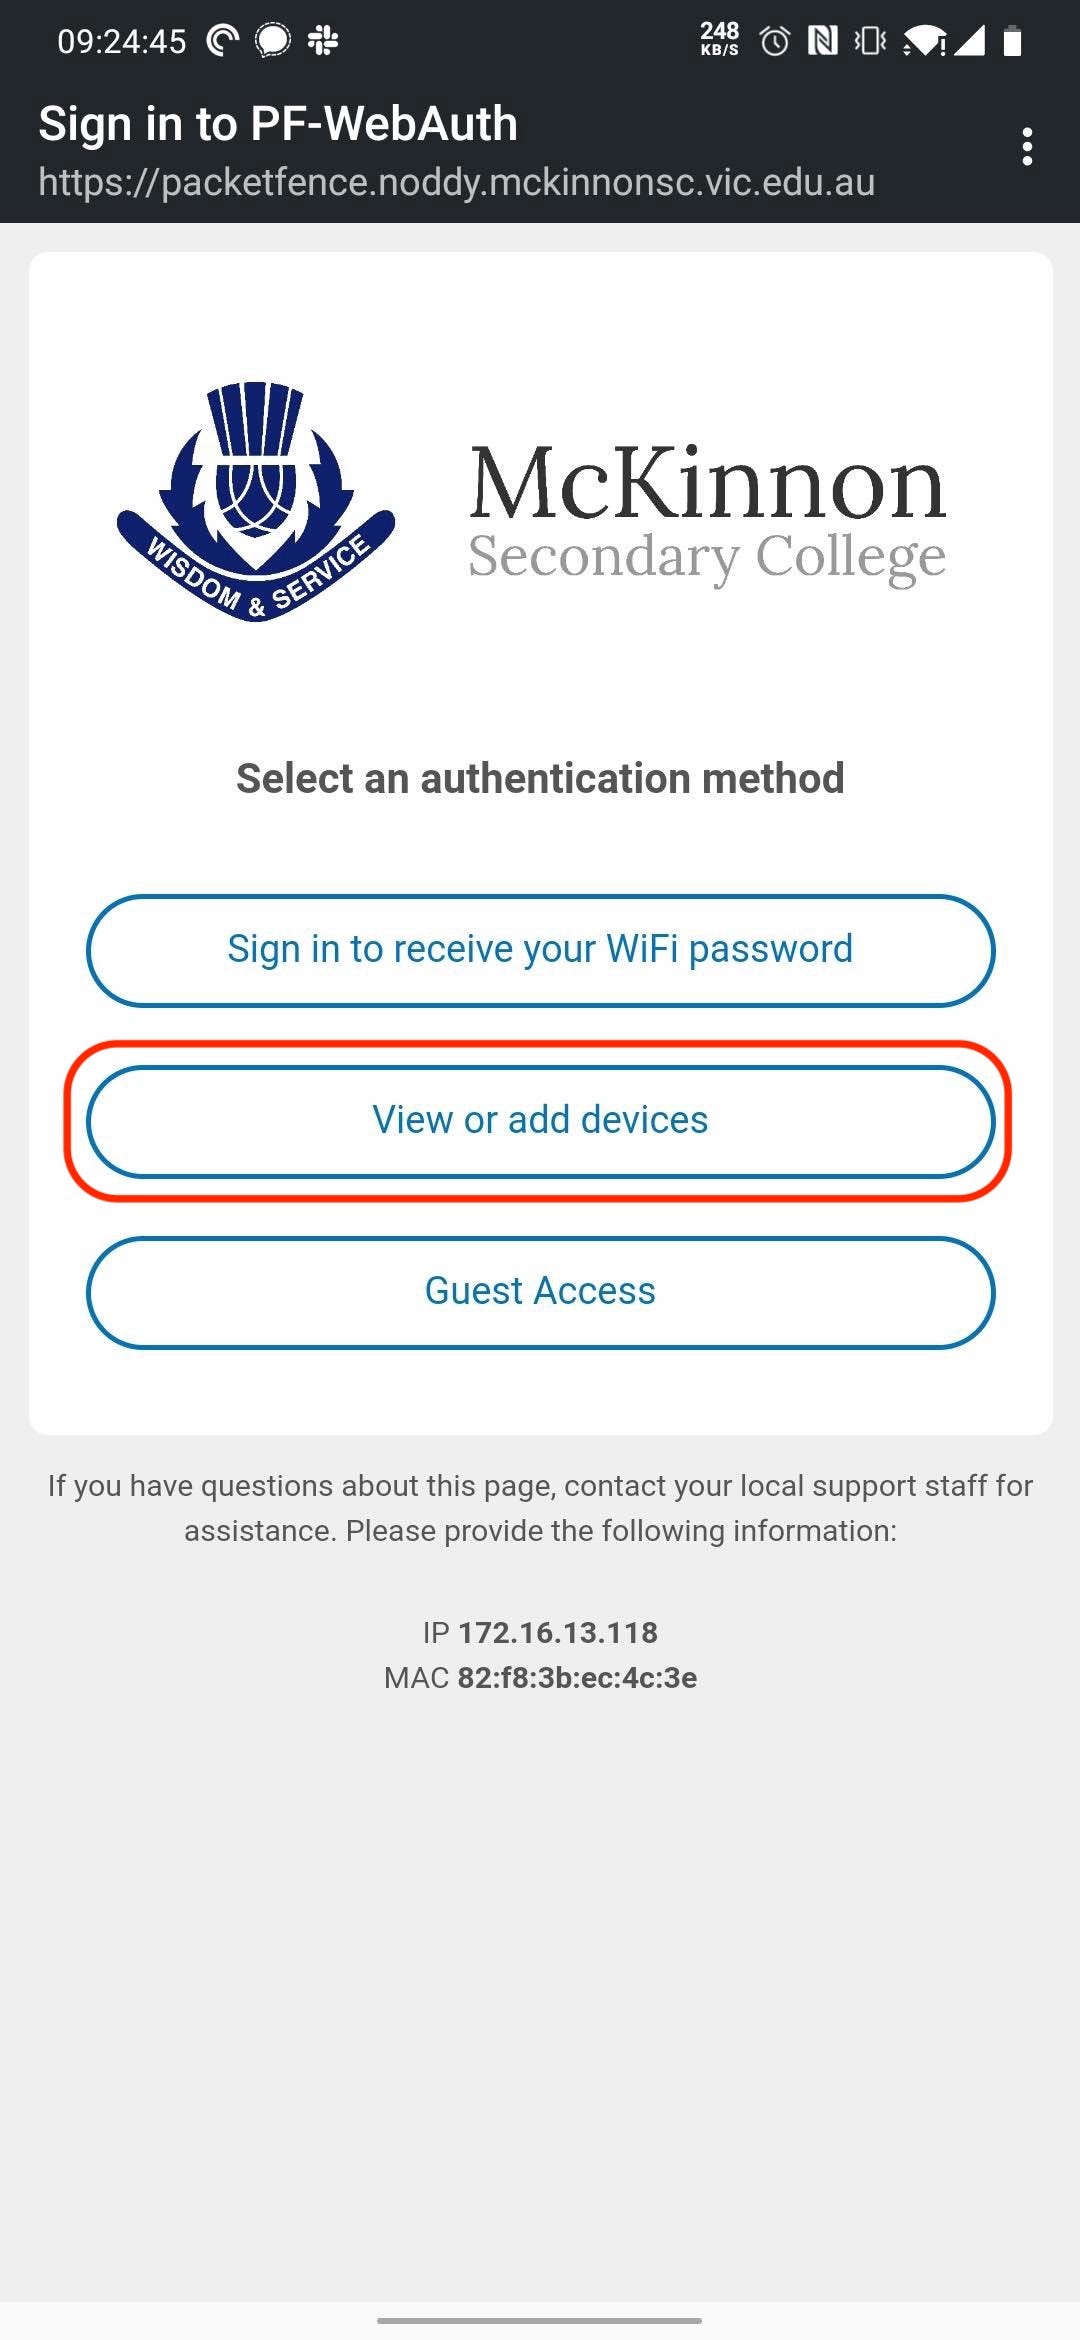
In the end, this is what the user experience looks like if I were to connect my phone using my student username and password.

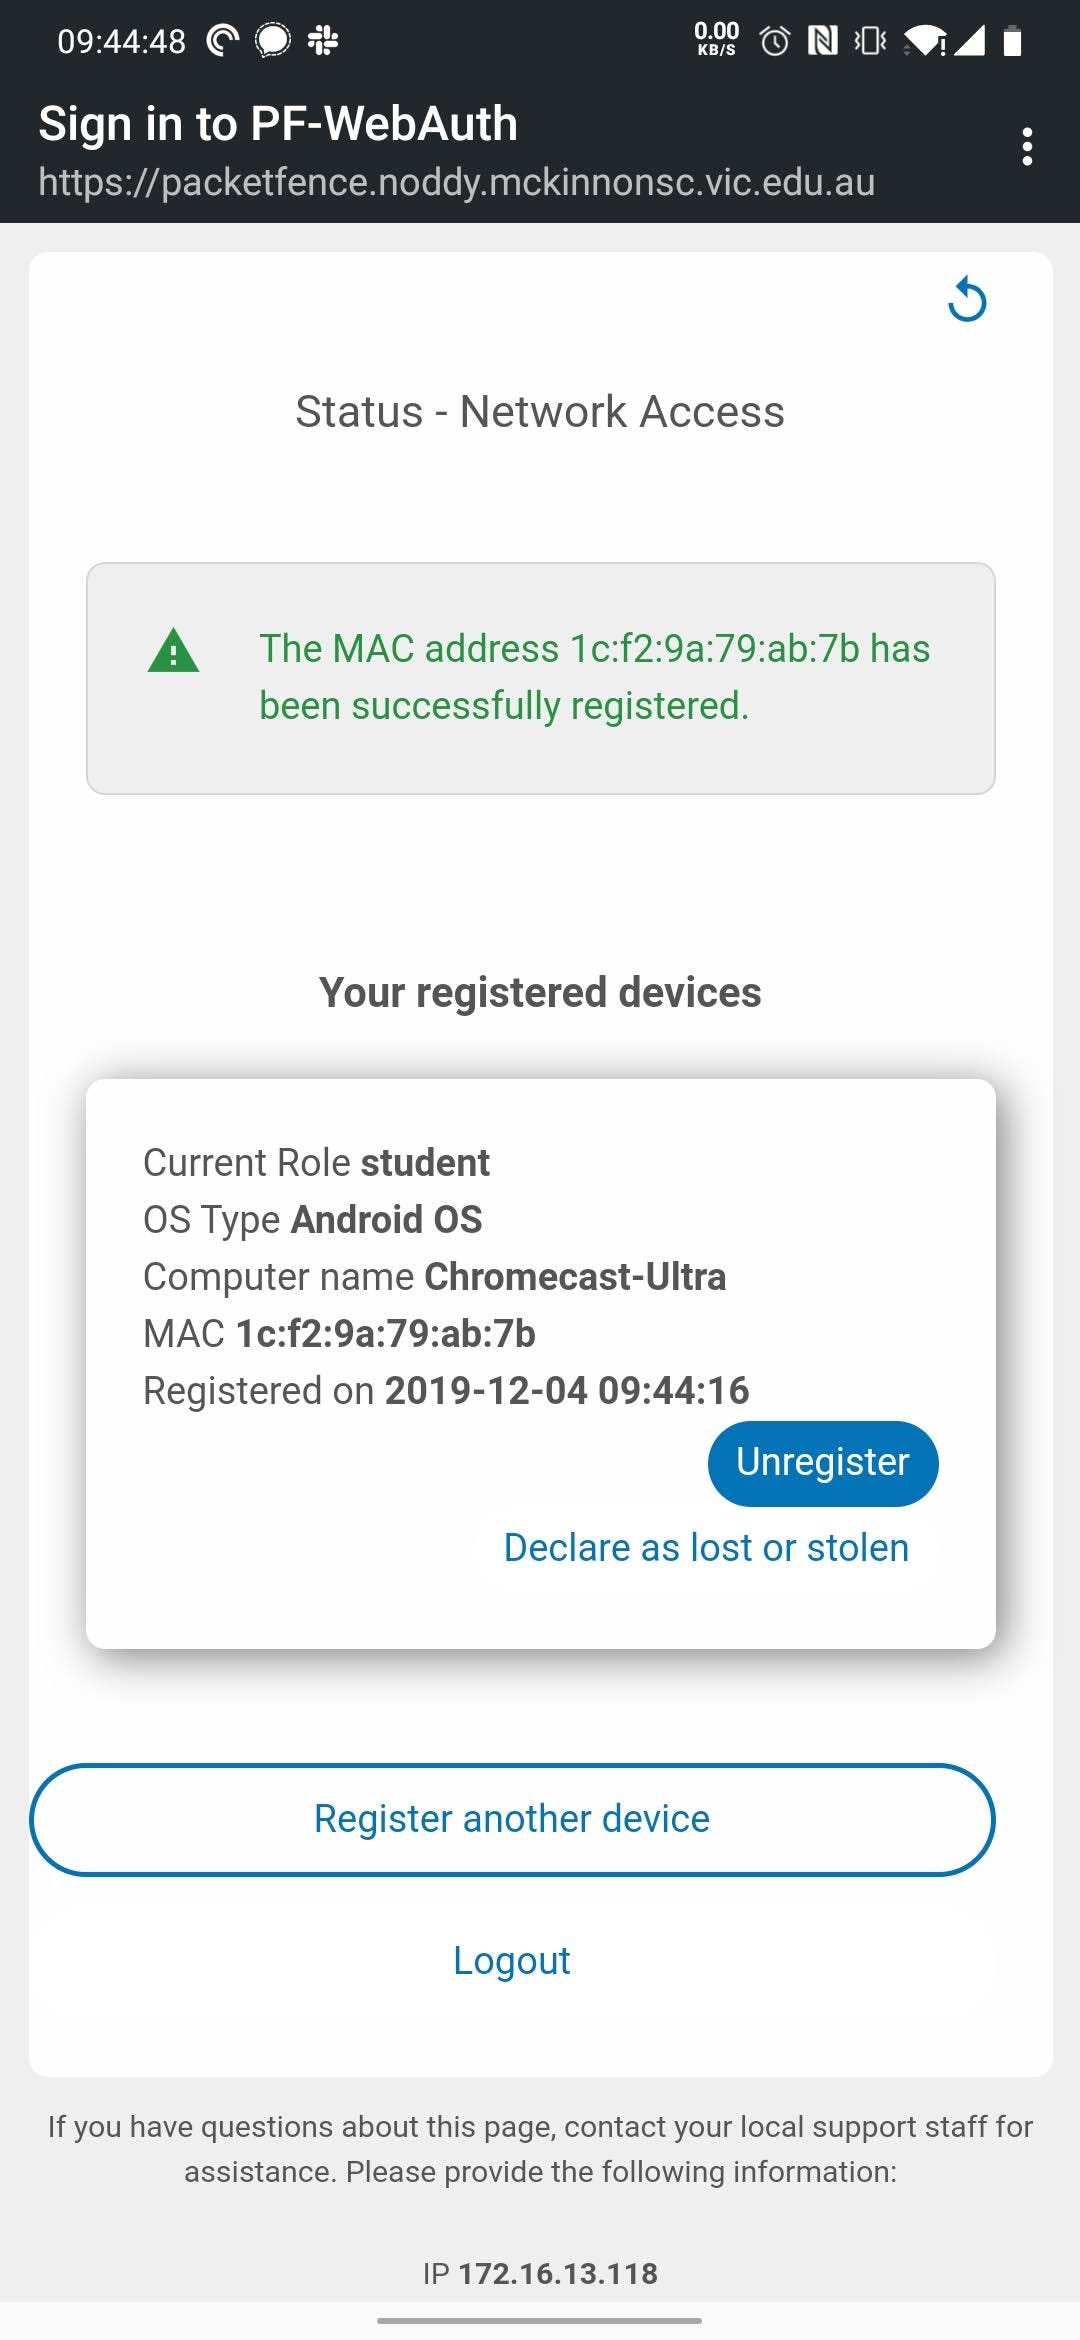
Users can choose to manage their devices, with the option to connect a device using its MAC address. This is extremely useful in the case of an IoT device such as a Google Home or a Chromecast.

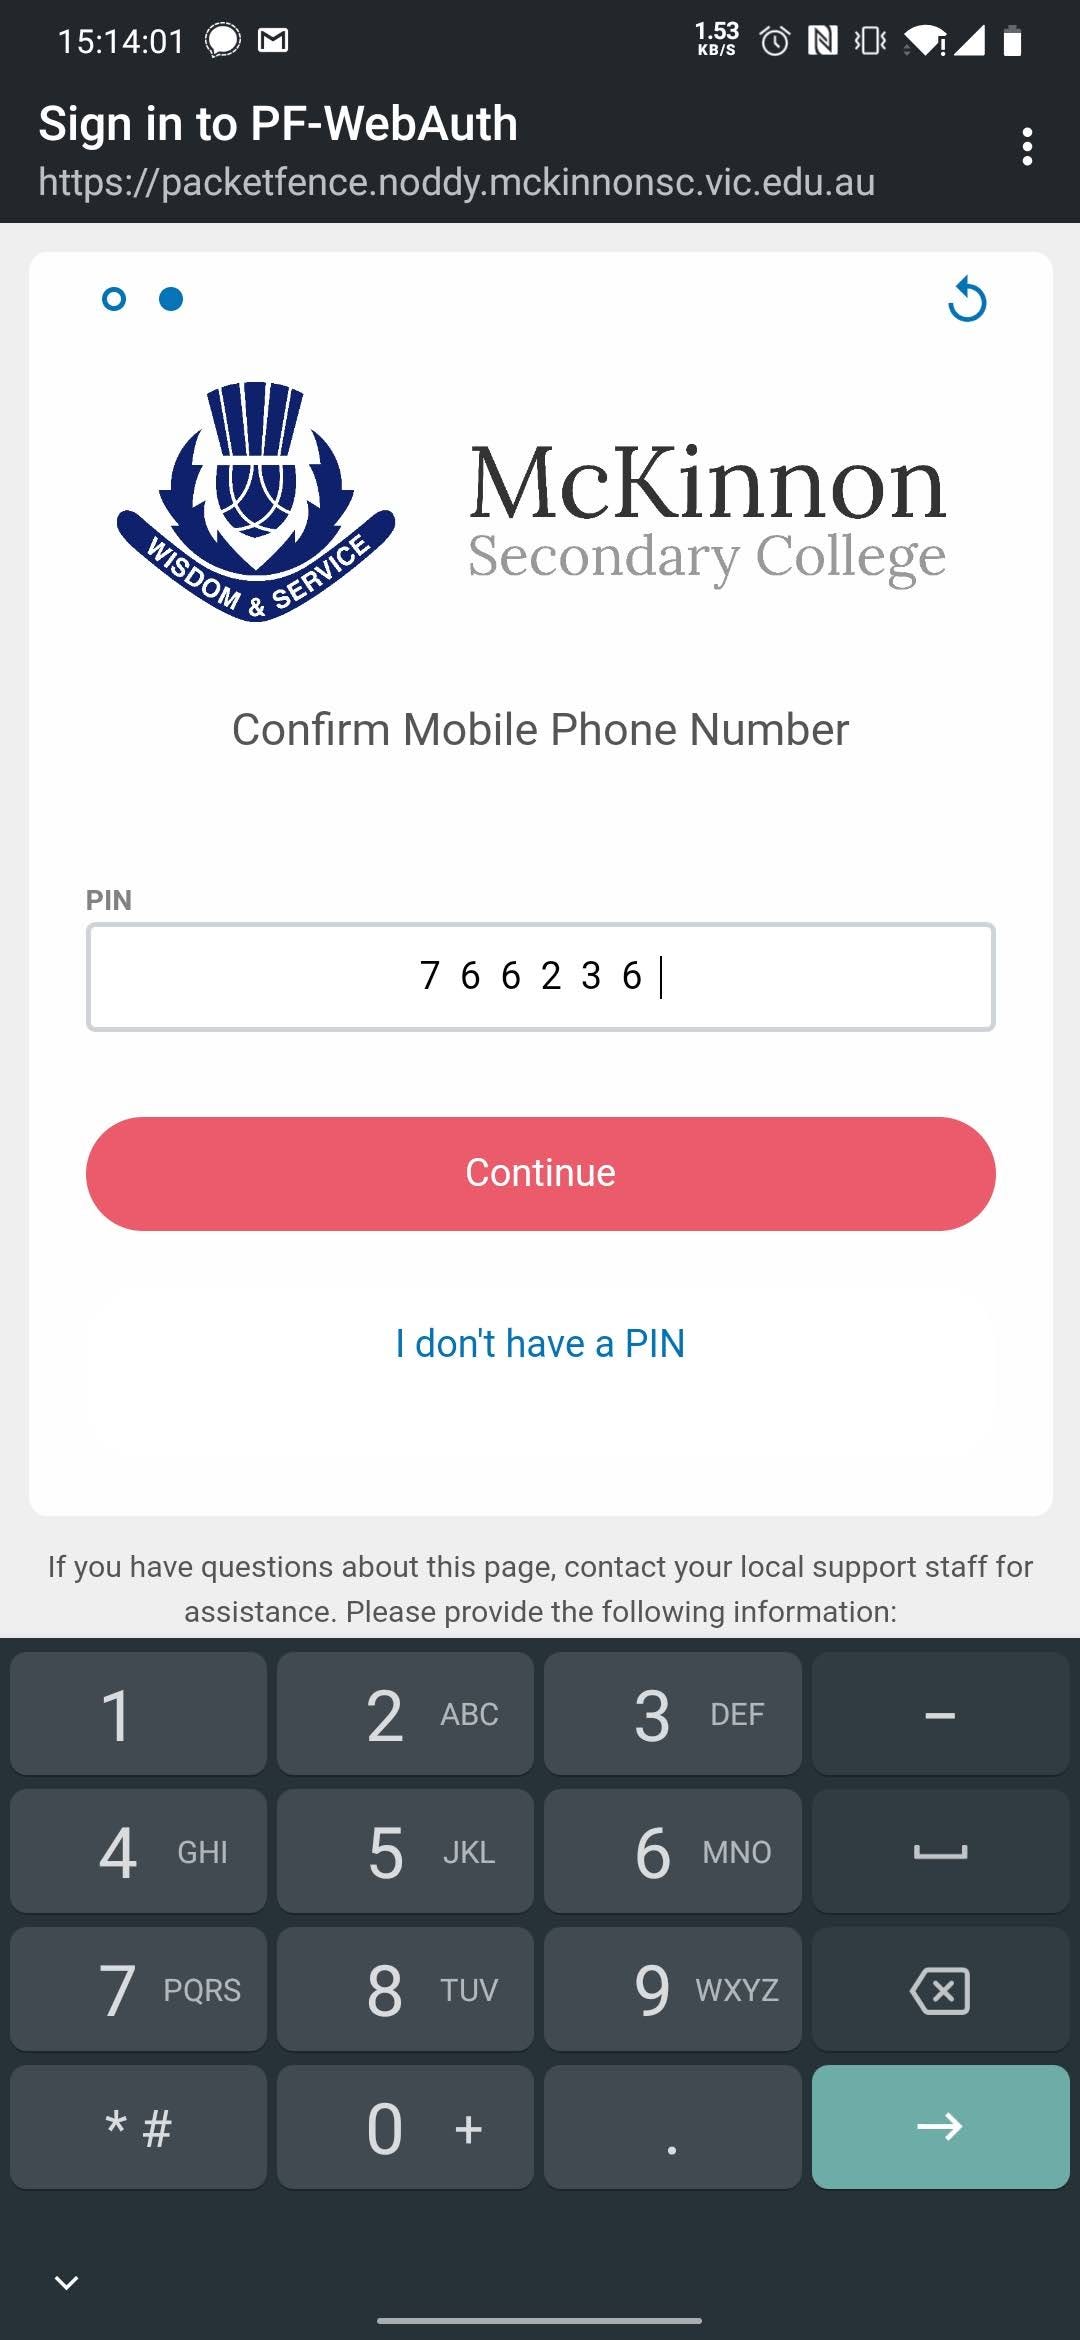
Guests can easily connect by accepting the terms and verifying a phone number, which provides some accountability without being a barrier to their access.

PacketFence is an absolute beast. Figuring all this out was a bit of a roller coaster, but once you get it up and running the experience is about as good as WiFi authentication gets.
I’m sure I’ve missed something, but I hope this information is able to help someone to get up and running with their own PacketFence solution, while saving their organisation $20,000+ p/a.
No comments:
Post a Comment